Working with Templates
On this page:
- Opening a Template
- Create a New Template
- Copy to a New Template
Opening a Template
To select and open a template, please follow the instructions below:
- Open Excel and click on the ‘True Sky’ tab in the Ribbon Bar.

- Click the ‘Hub’ button and the True Sky Hub pane will appear on the left side of your screen. Enter your True Sky login credentials if necessary.

- To access a template, click on the ‘Templates’ tab.
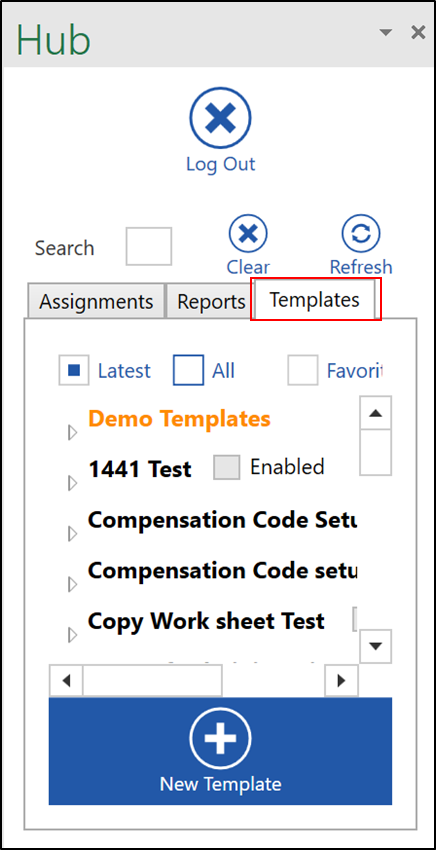
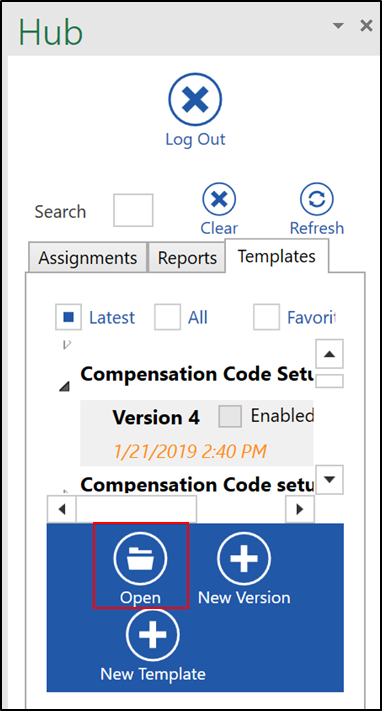
- Select the template you wish to view, and click ‘Open’.
Create a New Template
To create a new template from scratch, please follow the steps below:
- Open Excel and click on the ‘True Sky’ tab in the Ribbon Bar.
- Click the ‘Hub’ button and the True Sky Hub pane will appear on the left side of your screen. Enter your True Sky login credentials if necessary.
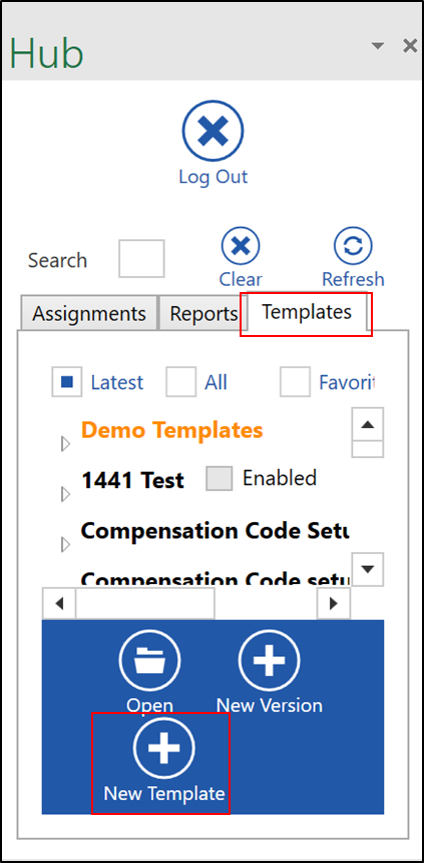
- Click on the ‘Templates’ tab, and then click on ‘New Template’.
- Provide a template name, folder and option description. Also select whether or not this workbook will utilize Excel Macros.NOTE: If you wish to create a template that will utilize macros, this choice must be made at initial template creation time.
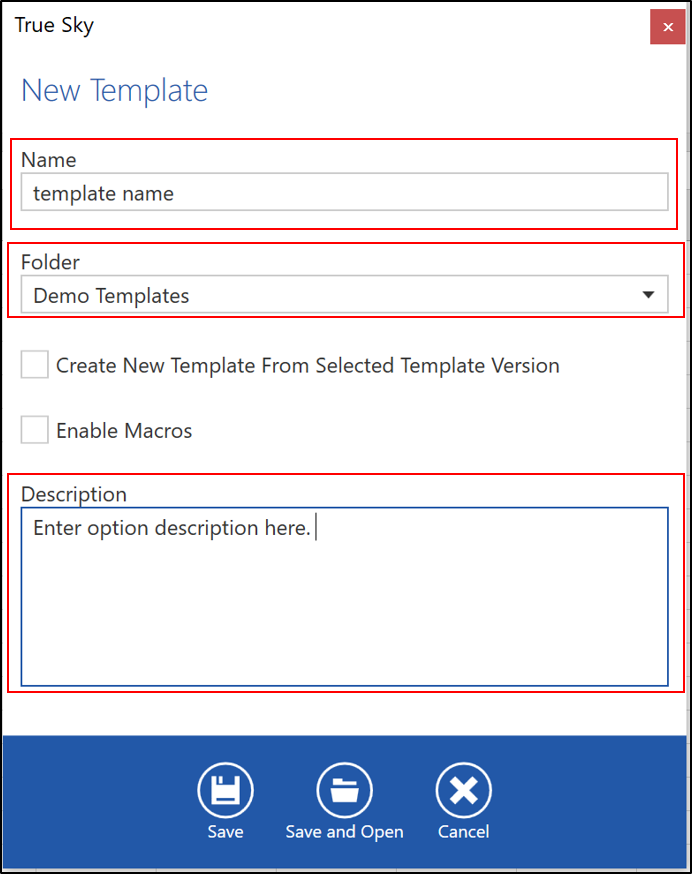
- Click ‘Save’. Or ‘Save and Open’ if you wish to open the template immediately.
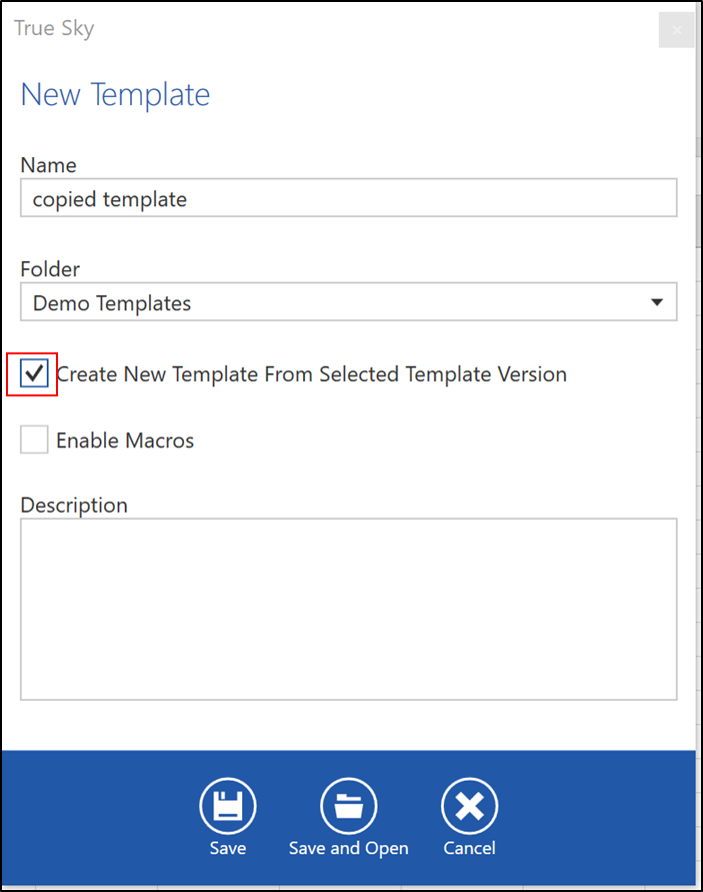
If there is a pre-existing template that is desirable to assist in making a new one, select that template before clicking on the ‘New Template’ button. Then click on the checkbox next to ‘Create New Template Version from Selected Template Version’. Then click ‘Save’ or ‘Save and Open’ if you wish to work with the new template immediately. Instead of a blank template opening, an exact copy of the pre-existing template will open.
Copy to a New Template
It may be necessary to create new templates that you can use to adjust certain variables, for example, for a reforecast.
To do so, follow the steps below.
- Go to the Hub in True Sky
- Click “Templates”
- Select the template you want to create a copy of
- Click “New Template”
- Select “Create New Template From Selected Template Version”
- Give the template a name that you can distinguish
- Click “Save and Open”
- Click “Settings” in the top ribbon bar
- Expand “Dimensions”
- Expand “Scenario”
- Expand “Dimension Filters”. Depending on your layout, you will see different filters. Select the Dimension Filter you want to adjust for your new template
- For example, if you are looking to create a reforecast, you will want to change the Budget Dimension Filter
- Click “Edit” in the top ribbon bar
- Unselect the existing option and select your new Dimension Member to align with your new template.
- For example, if you are looking to create a reforecast, select the Reforecast Scenario
- Click “OK”
- If you have multiple sheets, repeat steps 9 to 14 for each sheet.
- Click “Save” in the top ribbon bar
- To publish the new template to your end users, reference this help document


