Publishing Assignments and Reports
On this page:
- Create a New Assignment
- Create a Report
- Add a New User to an Existing Assignment or Report
Create a New Assignment
To create a new Assignment, please follow the steps below:
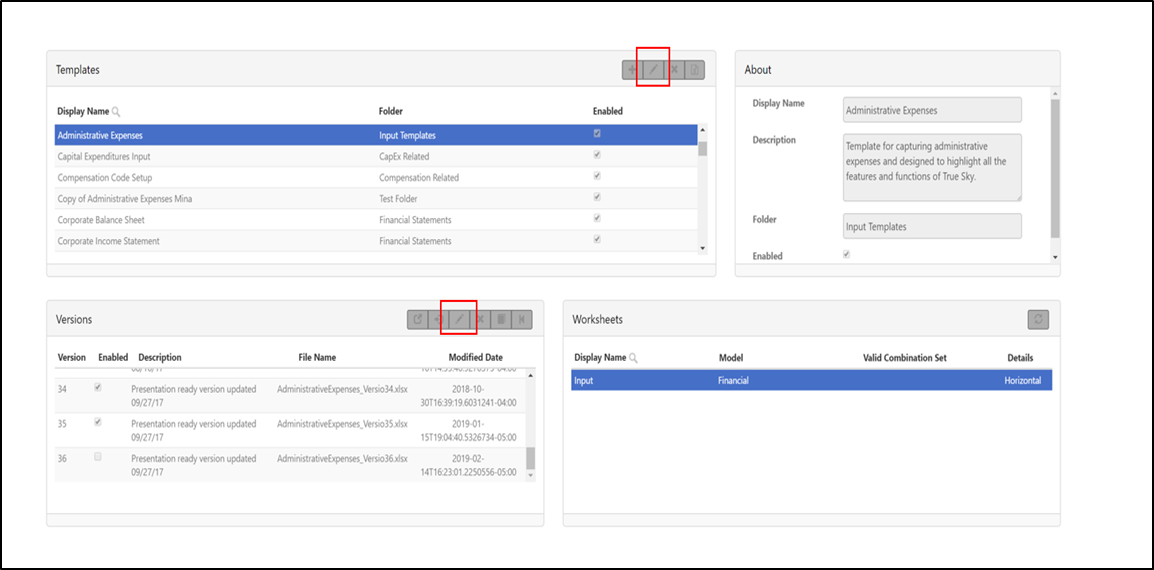
- Open the Admin Console and click on the ‘Workflow’ menu at the top of the page. Select ‘Templates’.
- Select the Template you wish to create an Assignment for.
- Check to ensure the Template and Version you want to use are ‘Enabled’ by clicking on the pencil icon. If the ‘Enabled’ box is not checked, please click on it to make sure you see the checkmark.

- Navigate to the ‘Assignments’ tab under the ‘Workflow’ menu.
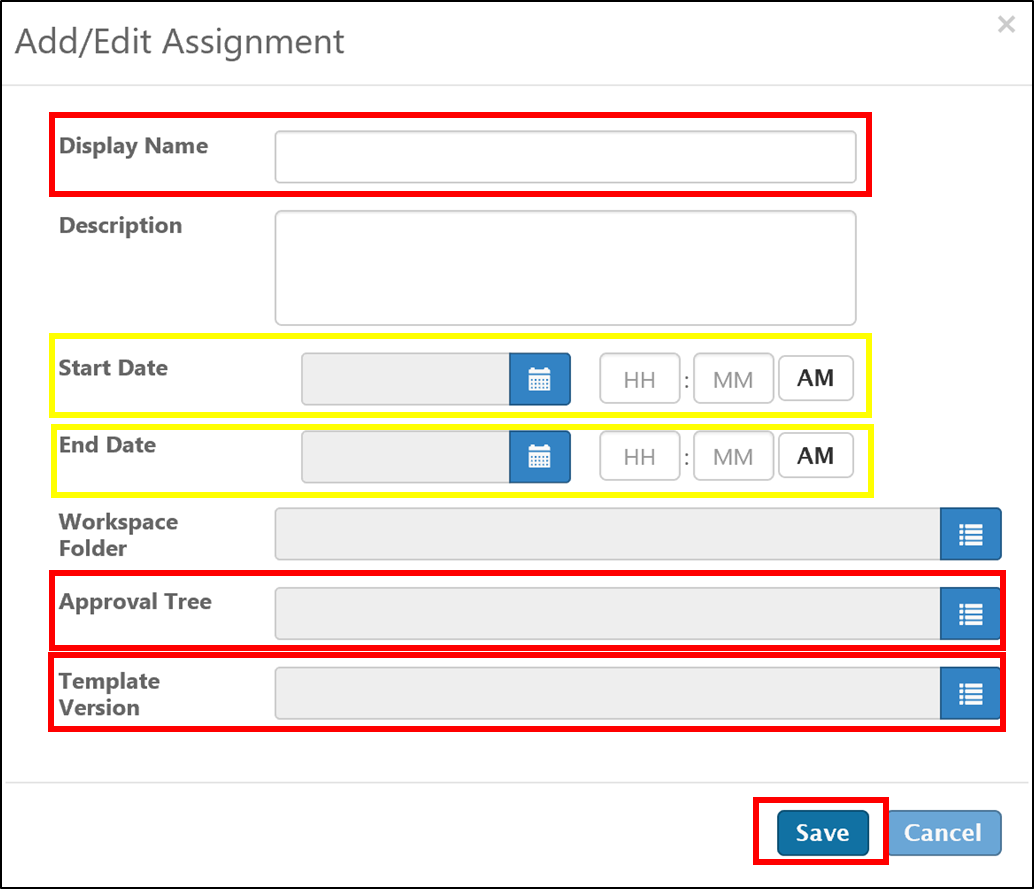
- Click on the ‘+’ icon to add a new assignment.
- Fill the pop up form with the Display Name of the Assignment, Start and End date (can be left blank), Approval Tree, Template Version, and any other relevant fields. Then click ‘Save’.

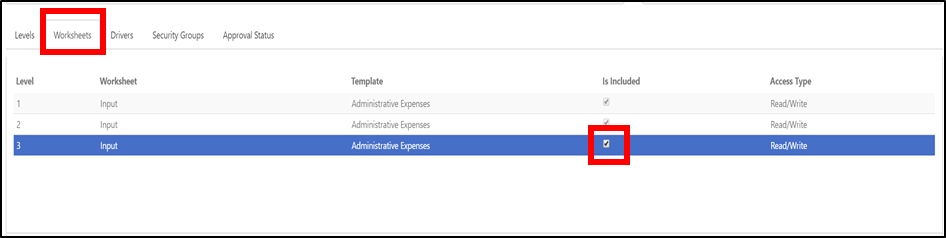
- Select the ‘Worksheets’ tab and select the ‘Is Included’ box for all worksheets you wish to include in the Assignment.
- Select the ‘Drivers’ tab and select the ‘Is Included’ box for Dimensions that will be used to “drive” or move the Assignment forward through the Approval Tree.
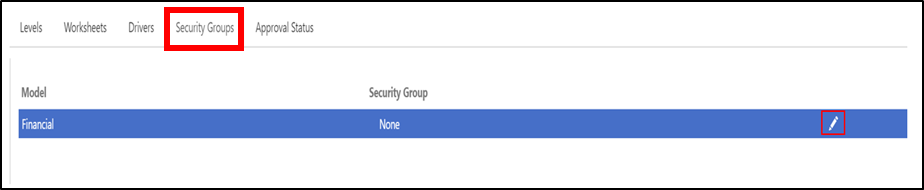
- Select the ‘Security Groups’ tab and click on the pencil icon to add a security group.
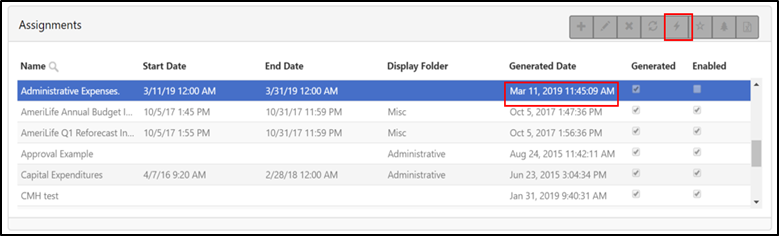
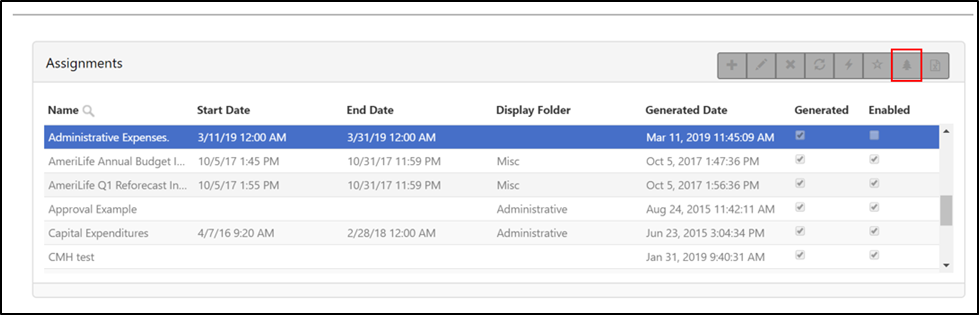
- In the ‘Assignments’ section, click on the lightning icon to ‘Generate’ the Assignment. Continue to click the refresh icon until the ‘Generated Date’ is displayed.
- Enable the Assignment by selecting the Assignment, and clicking on the pencil icon. Then select the ‘Enabled’ box so you can see the checkmark and click ‘Save’.
Create a Report
To create a new Report, please follow the steps below:
- Open the Admin Console and click on the ‘Workflow’ menu at the top of the page. Select ‘Templates’.
- Select the template you wish to create a Report for.
- Check to ensure the Template and Version you want to use are ‘Enabled’ by clicking on the pencil icon. If the ‘Enabled’ box is not checked, please click on it to make sure you see the checkmark.

- Navigate to the ‘Reports’ tab under the ‘Workflow’ menu.
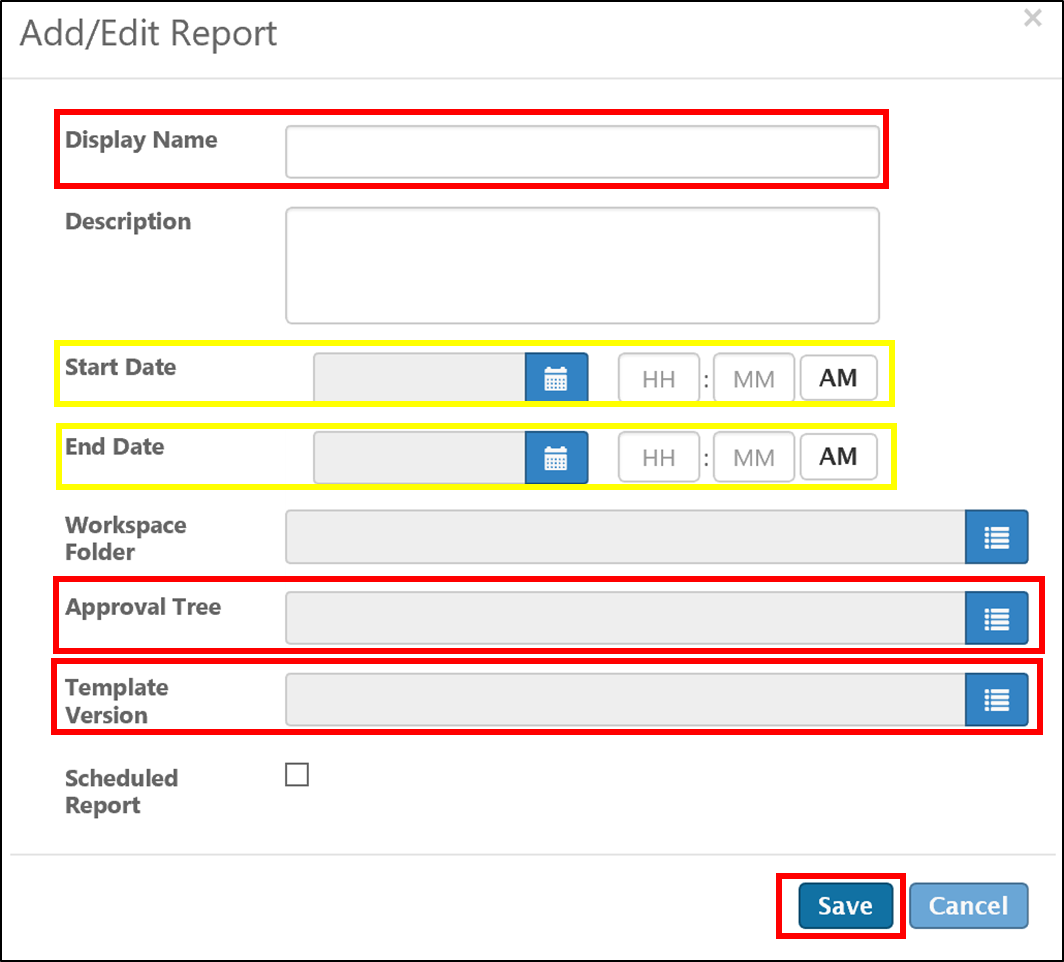
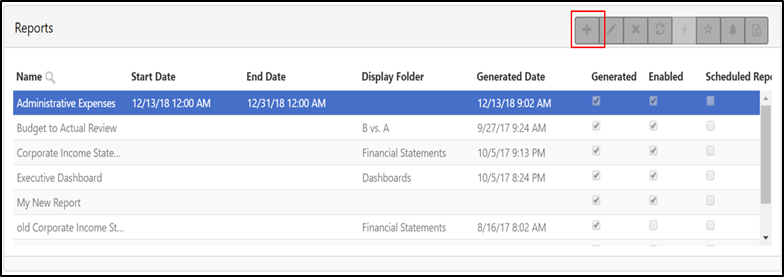
- Click on the ‘+’ icon to add a new report.
- Fill the pop up form with the Display Name of the Report, Start and End date (can be left blank), Approval Tree, Template Version, and any other relevant fields. Then click ‘Save’.

- Select the ‘Security Groups’ tab and click on the pencil icon to add a security group.

- In the ‘Reports’ section, click on the lightning icon to ‘Generate’ the Report. Continue to click the refresh () icon until the ‘Generated Date’ is displayed.
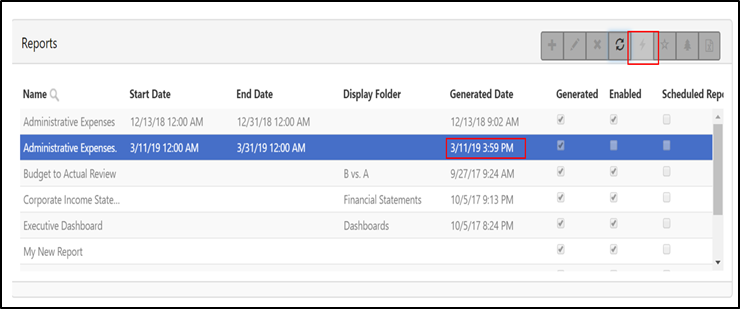
- Enable the Report by selecting the Report, and clicking on the pencil icon. Then select the ‘Enabled’ box in the popup so you can see the checkmark. Click ‘Save’.
Add a New User to an Existing Assignment or Report
To add a user to an existing Assignment or Report please follow the steps below:
- Open the Admin Console and click on the ‘Workflow’ menu at the top of the page. Select ‘Assignments’.
- Select the Assignment you would like to add the user to.
- Click on the Tree icon to add to the Approval Tree.
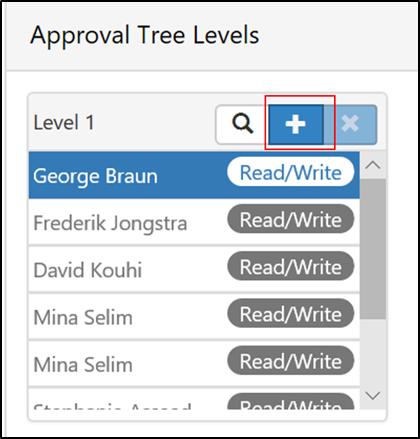
- In the ‘Approval Tree Levels’ section, click the ‘+’ icon to add a new user. Select the user you wish to add, then click ‘Back’.
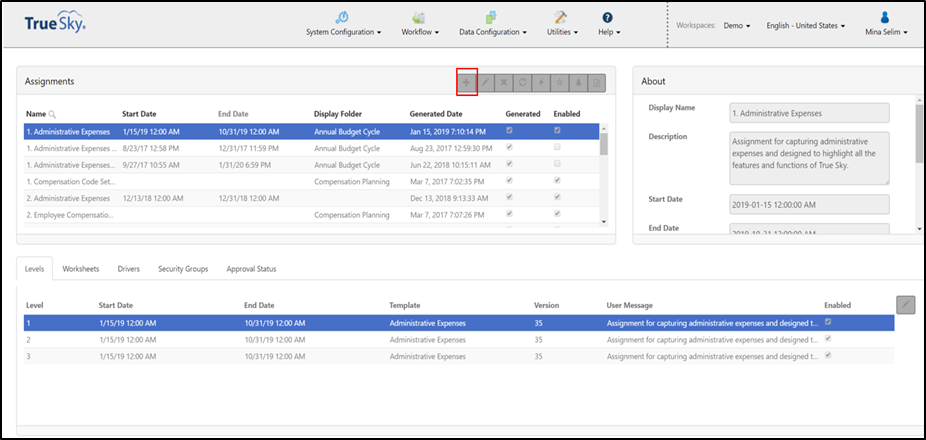
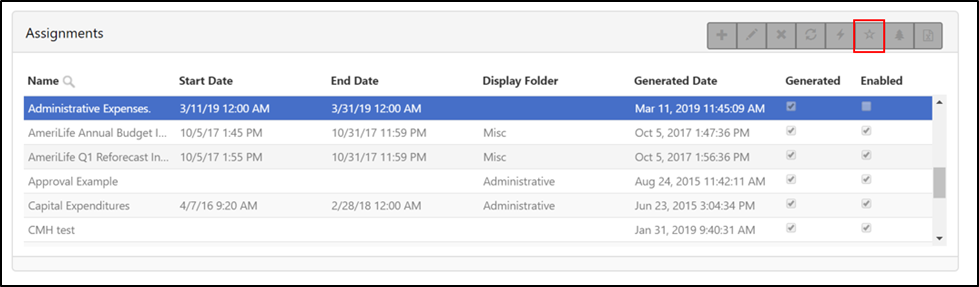
- In the ‘Assignments’ section, click on the star icon to add the user to the security group.
- Add users to the security group by clicking on the ‘+’ icon in the ‘Users’ category. Proceed to select the user of choice.
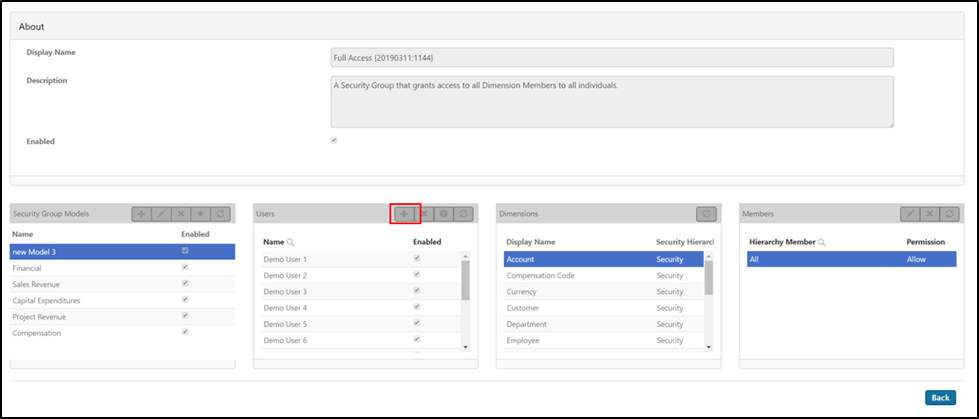
- Add the security members to the dimensions by clicking on the pencil icon under the ‘Members’ category.
- Once back in ‘Assignments’, choose the assignment you wish to generate. Click the lighting icon to start the generation.
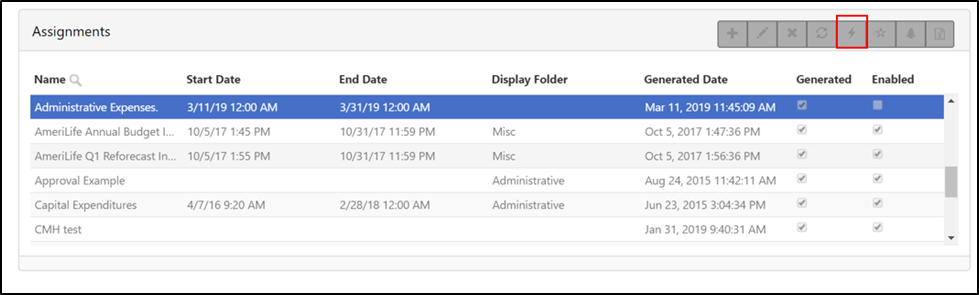
- Click the refresh icon until the ‘Generated Date’ is displayed.