Working with Security Groups and Approval Trees
On this page:
- Accessing Security Groups
- Disabling a Security Group
- Editing a Security Group
- Enabling a Security Group
- Editing an Approval Tree
- Deleting an Existing User Security Setting
- Adding a New User Security Setting
- Selecting the Correct Security Settings
Accessing Security Groups
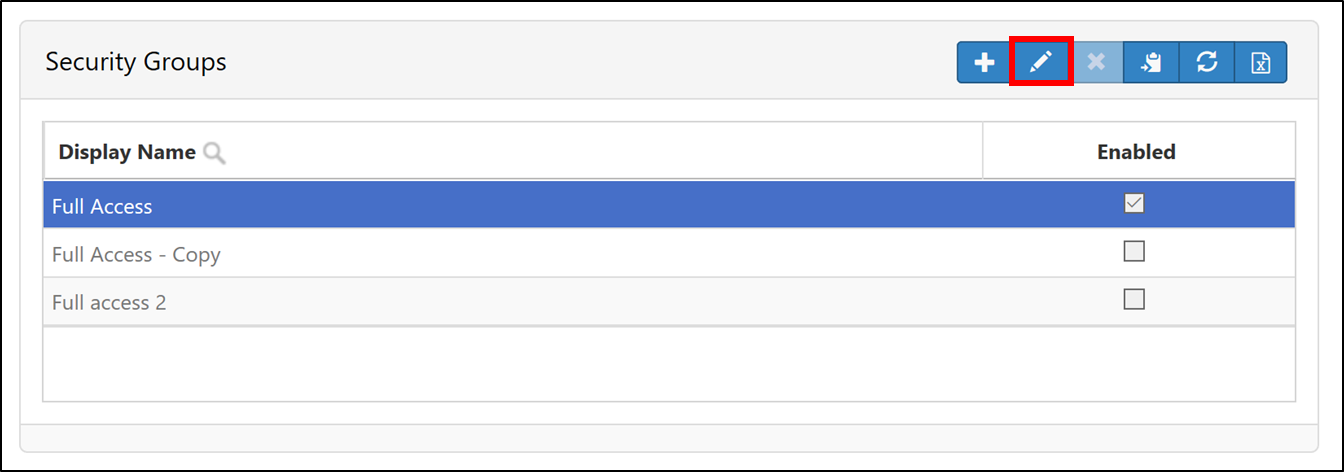
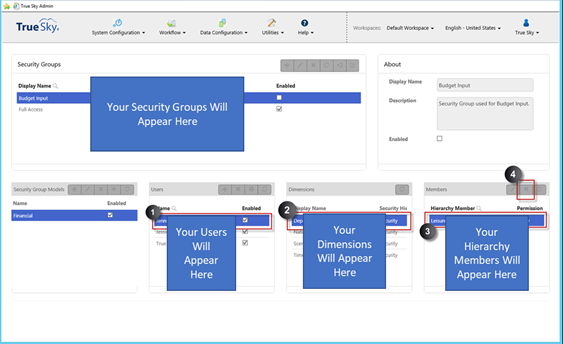
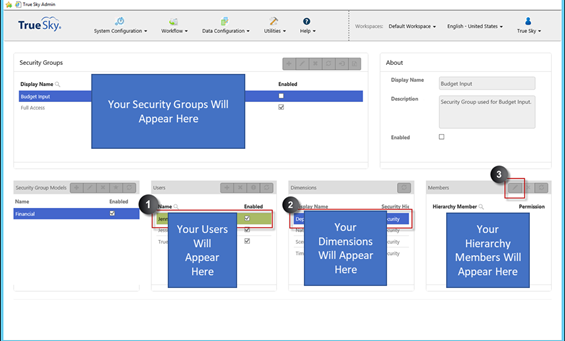
- Open the Admin Console and click on the ‘Workflow’ menu at the top of the page. Select ‘Security Groups’.
Disabling a Security Group
- Open the Admin Console and click on the ‘Workflow’ menu at the top of the page. Select ‘Security Groups’.
- Choose the Security Group you would like to edit and click on the pencil icon.

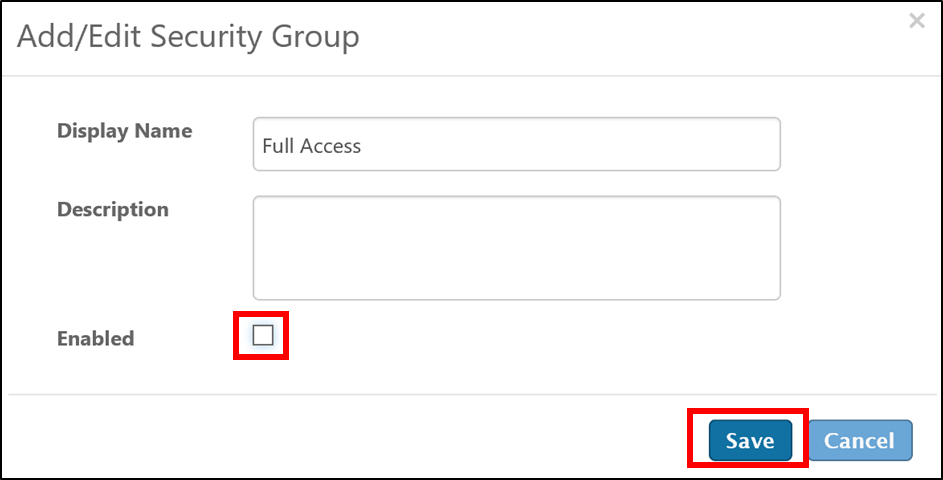
- Disable the Security Group by unchecking the ‘Enabled’ box, then click ‘Save’.
Editing a Security Group
- Disable the Security Group by following the steps above.
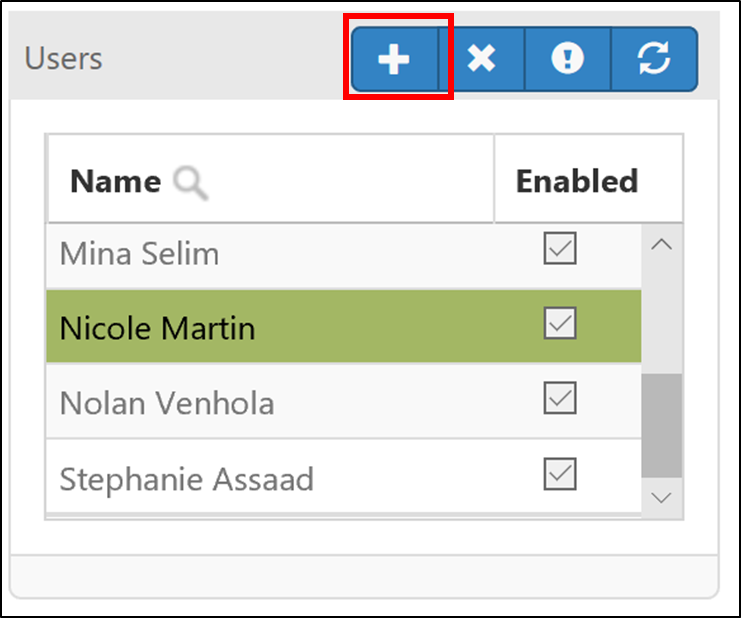
- To add a new user, click the ‘+’ icon under the ‘Users’ tab, and follow the steps below. To edit a current user’s permissions, select the user and follow the steps below.
- Select a Dimension.
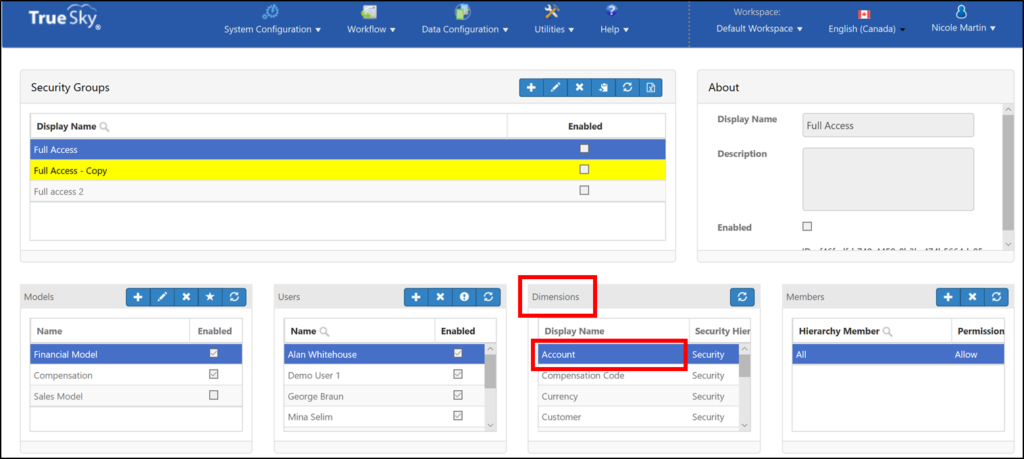
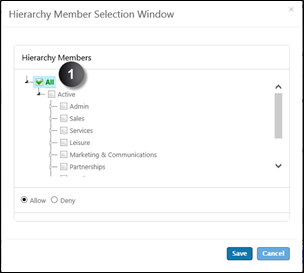
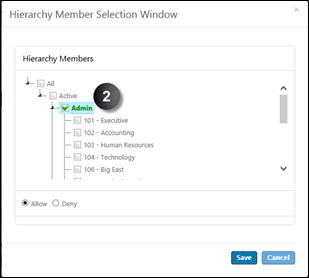
- Within the ‘Member’ box (next to the ‘Dimension’ box), click the plus sign and select the ‘Members’ a user has access to.
- Follow the steps below to enable the security group.
Enabling a Security Group
- Open the Admin Console and click on the ‘Workflow’ menu at the top of the page. Select ‘Security Groups’.
- Choose the Security Group you would like to edit and click on the pencil icon.
- Enable the Security Group by checking the ‘Enabled’ box, then click ‘Save’.
Edit an Approval Tree
To edit an Approval Tree, please follow the steps below:
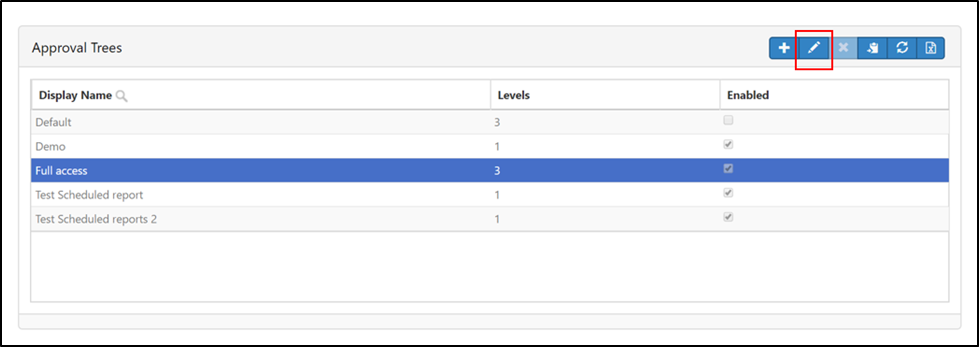
- Open the Admin Console and click on the ‘Workflow’ menu at the top of the page. Select ‘Approval Trees’.
- Select the Approval Tree you would like to edit and then click on the pencil icon.
- Uncheck the ‘Enabled’ box and click ‘Save’.
- In the ‘Approval Tree Levels’ section, click the “+” icon of the level you want to add the user to.
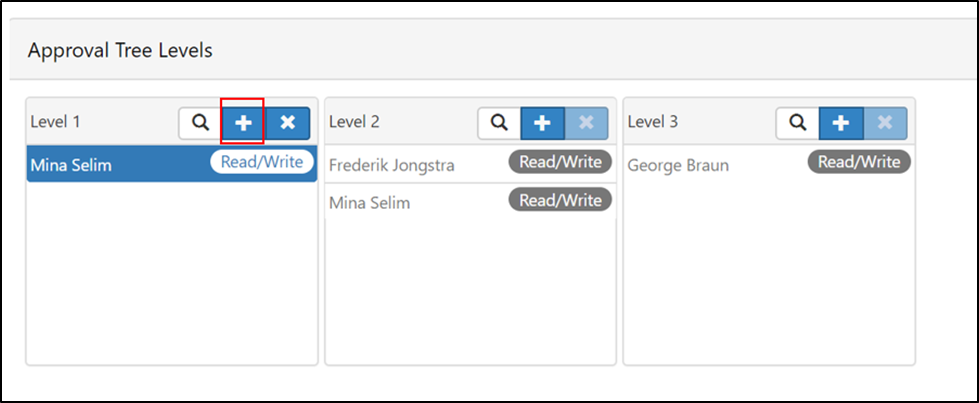
- Select the user you want to add to the Approval Tree, then click ‘OK’.
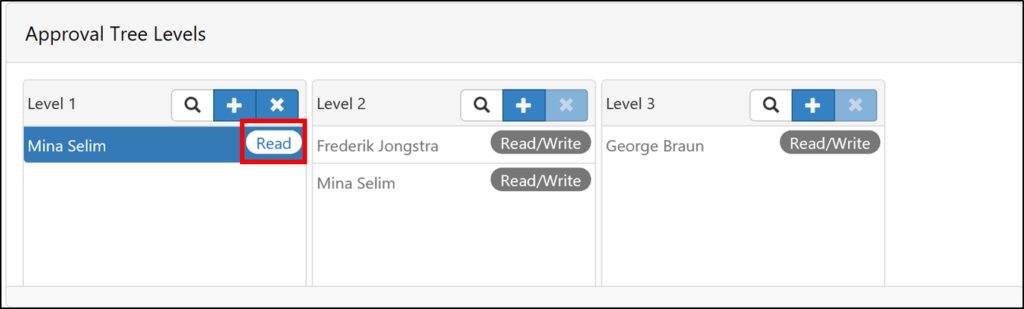
- Click on ‘Read’ to switch user to Read/Write (if applicable).
- Repeat steps 2 and 3 to enable the Approval Tree (Check the ‘Enabled’ box and ‘Save’).
Deleting an Existing User Security Setting
- Follow the steps above to access the security groups and select the user you want to edit.
- Select the dimension.
- Select the entry to be removed.
- Click ‘Delete’
Adding a New User Security Setting
- Follow the steps above to access the security groups and select the user you want to edit.
- Select the dimension.
- Click ‘Edit’.
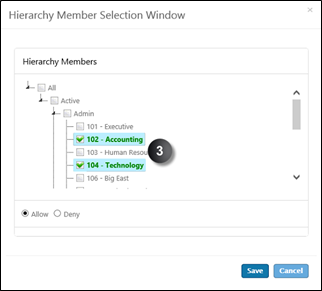
Selecting the Correct Security Settings
Security in True Sky can be set very broadly or very specifically. Access can be granted to specific items or such that new items are inherited automatically. Some examples are below.
In this example, the user receives access to all Departments.
In this example, the user receives access to just the departments under the “Admin” grouping.
In this example, the user receives access to just “Accounting” and “Technology” departments.
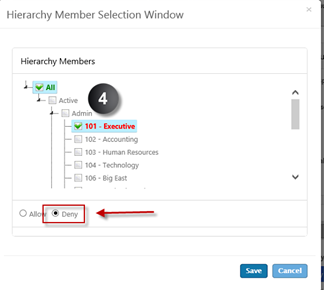
In this example, the user receives access to all departments except for the “Executive” department.